RootsMagic 9, the latest version of our popular genealogy software, introduces an exciting new feature called “Associations”. This innovative addition, also known as the “FAN method” or “cluster research”, is a powerful research tool that provides a unique way to expand family research and discover connections beyond traditional family lines.
It allows you to document relationships between two people in your file that aren’t necessarily related. They could be friends, neighbors, or even something like an enslaver / enslaved person relationship.
Adding an Association
You can add an association in two different places:
- From the Add button on any of the People views
- From the Add fact list when editing a person

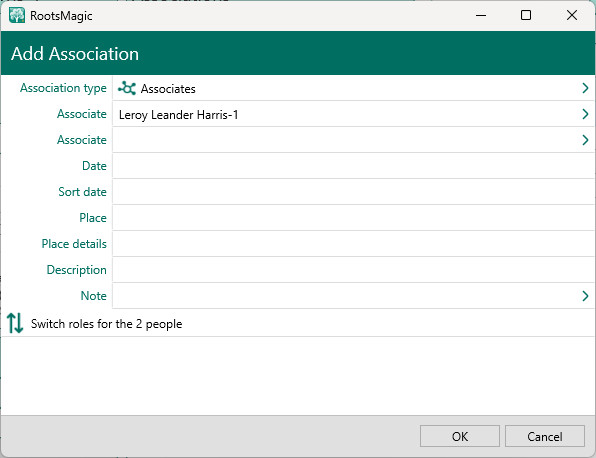
When adding (or editing) an association, you can enter the following information:
- Association type: The type of association (friends, neighbors, etc.). You can also create your own association types.
- The 2 people: You can select the two associated people using the selection list. If the two people are reversed, you can use the “Switch roles for the 2 people” button to switch them.
- Date: The date (or date range) for the association
- Sort date: A non-printing date used to sort the association with other events and associations
- Place: The place for the association
- Place details: The place details for the association
- Description: A short (one line) description for the association
- Note: Any text you want to enter describing more details about the association
When editing from the Edit Person screen, you can also add source citations, media, and even tasks to the association.
Association View
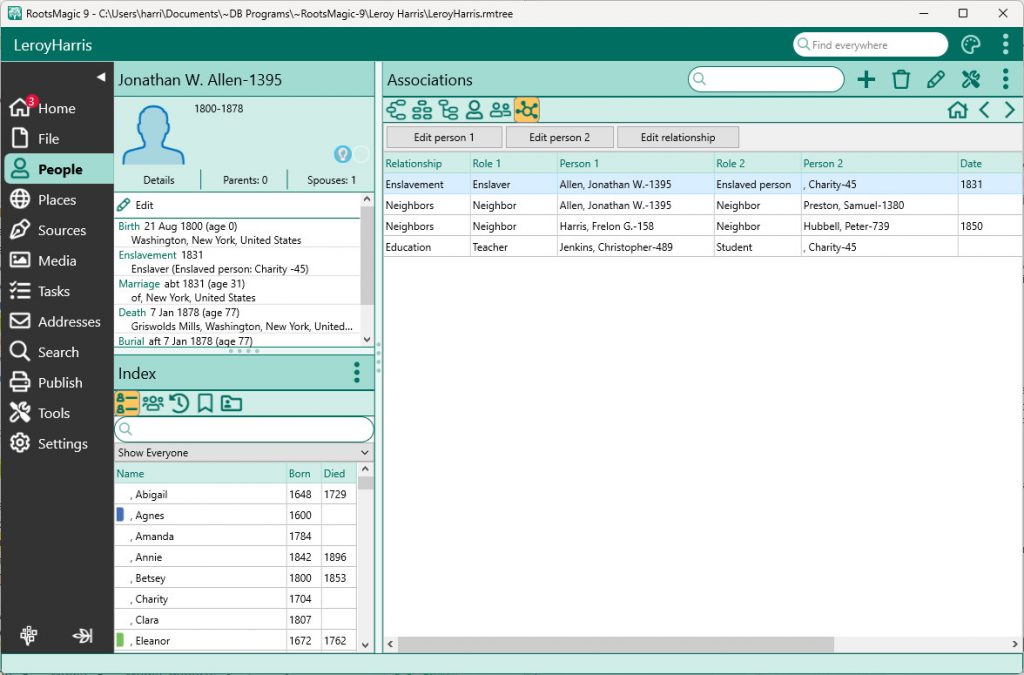
On the main screen, the new Association view is a list of all the associations in your file.

From the association view, you can:
- Sort the list: Click the header of the column to sort by
- Filter the list: Type in the name of the person you want to filter by
- Edit either person: Click “Edit person 1” or “Edit person 2”
- Edit the association: Click “Edit relationship”
Association List
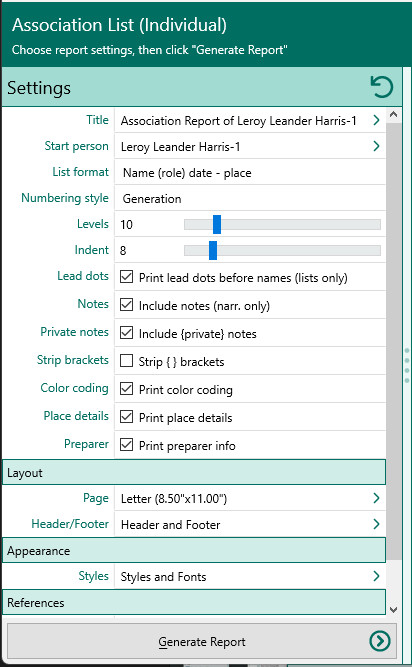
There is also a new report called the “Association List”. It displays an indented list of the highlighted person’s associations. The list will include all associations for the person, plus all the associations for the associated people for as many levels as you select.

To print an association list:
- Select the Publish page
- Select “All reports and charts”
- Select “Association List (Individual)”
- Select your options from the Report Settings panel
For a demonstration of Associations in action, watch the video tutorial available here. This new feature is a powerful tool for genealogists and family historians, offering a new way to explore and document the complex web of relationships that make up our pasts.
