Tip: Make a Map of Your Family’s Migrations

Migration-Maps

Here at RootsMagic HQ, today is “Pioneer Day”, a local holiday where we celebrate our ancestors and the diverse peoples who settled this area. One fun project for Pioneer Day (or any day for that matter) is to make a map showing where our ancestors lived and how they migrated and moved about. There is just something special about looking at a visual map that communicates so much more than a printed list of places can.

FA-DVD-Box-Mockup

We happen to have a product which makes making these maps a snap. It’s called Family Atlas. Now, Family Atlas is a standalone program. You don’t need our RootsMagic software to use its features, although it can read your RootsMagic file as well as genealogy and map files from a variety of different sources.  One common use of it is to import your family data from your genealogy software and then create and print personalized family maps from that data. It is one-of-a-kind software that lets you visualize and publish your family history in a unique and compelling way. Be sure to read to the end of this tip to learn about a special limited-time discount on this software.

 When you first open Family Atlas, you’ll see a blank, interactive, zoomable world map. At this point, you need to add “Marker Sets” to add people, places, and events to your map. To do this, click on the Green “Plus” icon in the upper-left corner of the screen. The “Add Marker Set” screen will appear.

Migration-01

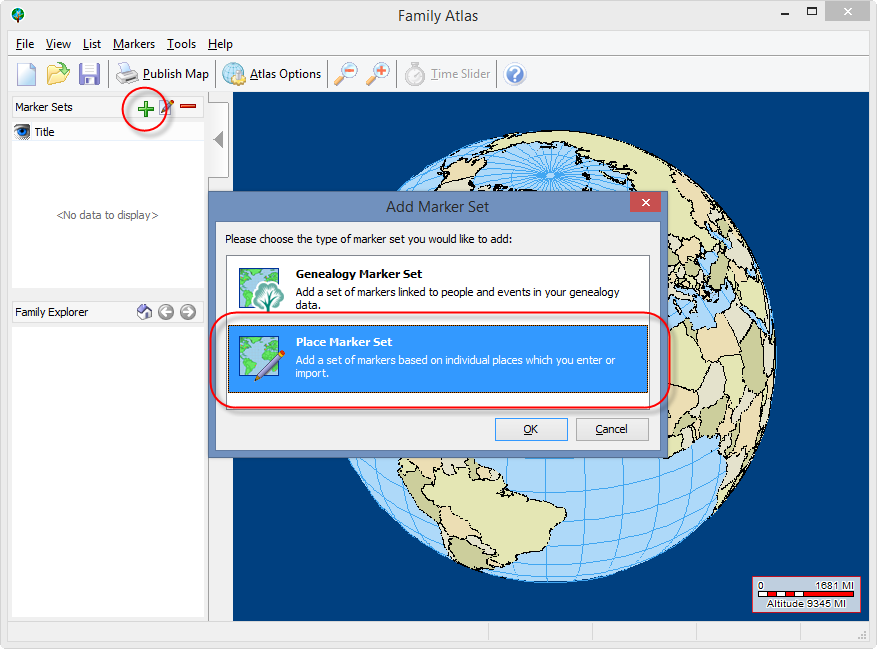
Click Place Marker Set and then OK. The “Edit Place Markers” screen will appear.

Migration-06

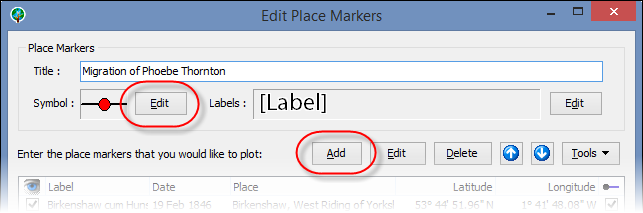
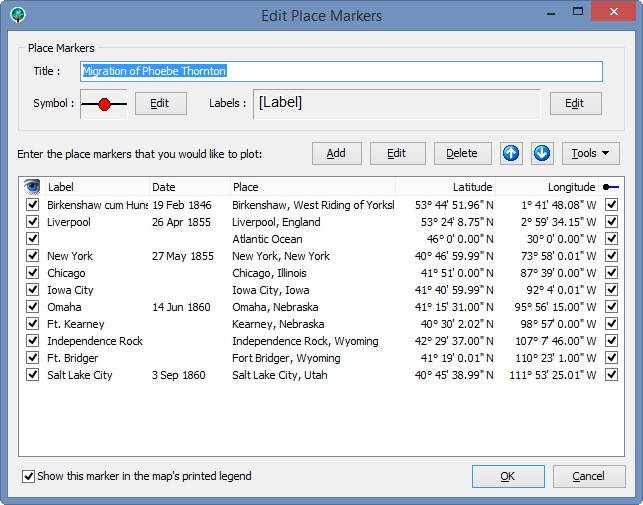
This is where you will add all the points that you want to plot on the map. First, give the marker set a title. Click Edit next to “Symbol” to change the color, shape, and connecting lines between each marker.  Click Add to add a new marker to this set. The “Edit Place Marker” screen will appear.

Migration-02

Add a label, date, and location for the marker. If Family Atlas recognizes the place, it will automatically add the Latitude and Longitude for you.  Click OK to finish adding the marker.  Repeat this last step for each marker that you wish to add.

Migration-03

Click OK to save your changes and return the the main screen. Here you can see your map. Pan and zoom the map however you wish. Feel free to explore the various details. You can click Atlas Options to change map colors, fonts, and more.

Migration-04

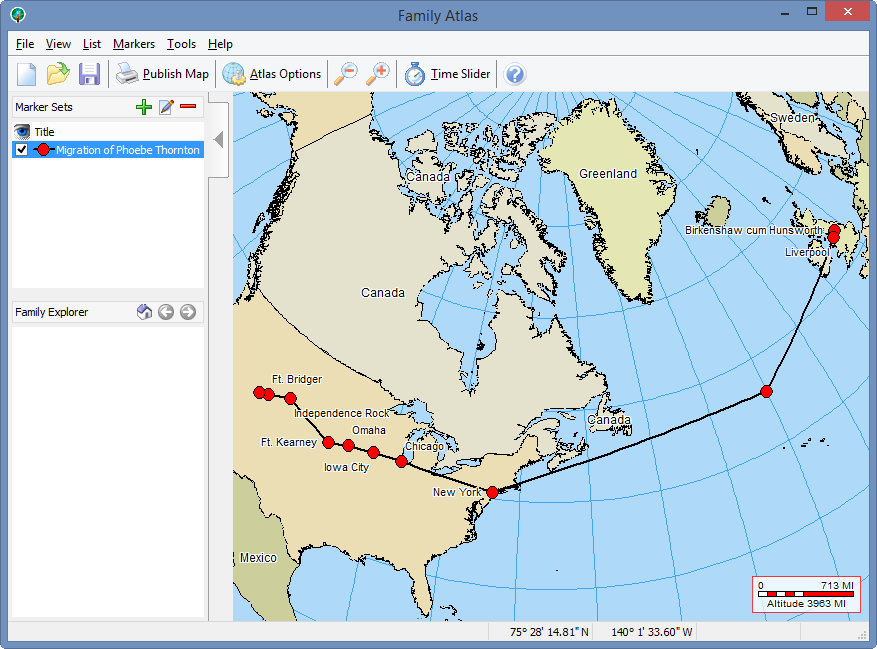
When you have the map colored and zoomed just as you want it, click Publish Map to take a snapshot of the map and open up the publisher tool.  Here you can add text, pictures, arrows, and more to annotate and beautify your map.

Migration-05

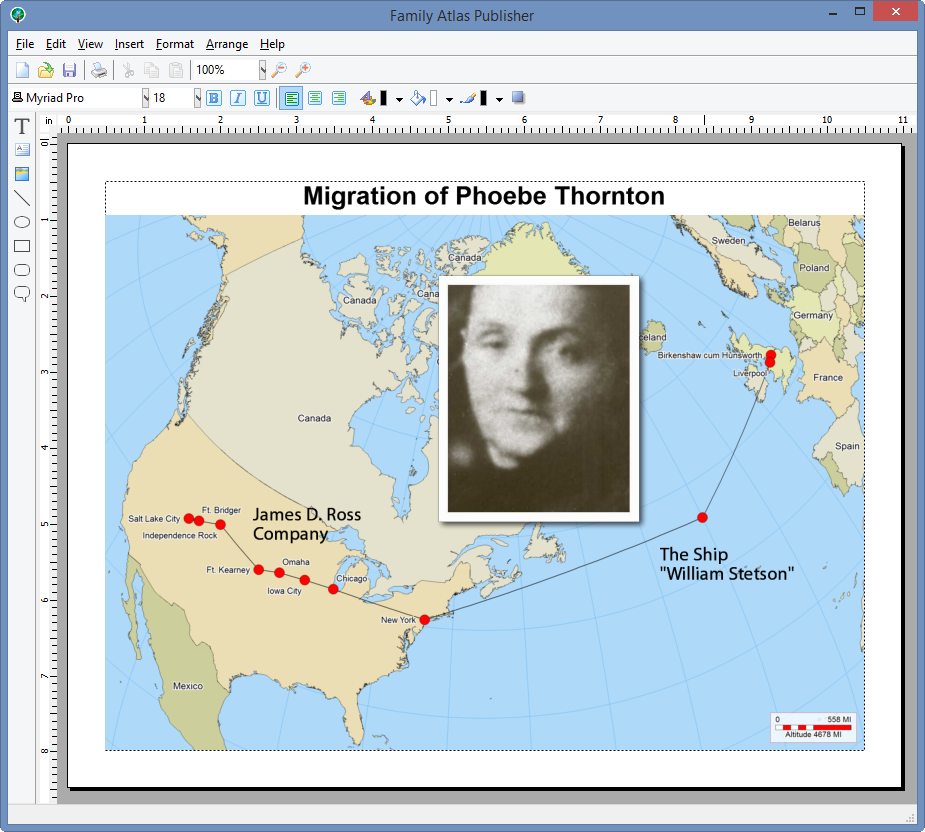
 Now that your map is ready, you may print it or save it to a PDF or graphic file to put online, add to a story, or share with others!

Would you like to learn more about Family Atlas and see it in action? Then watch our recorded webinar on Mapping Your Family Tree with Family Atlas.

Special Discount on Family Atlas

We are pleased to offer a limited-time discount on Family Atlas.  Through August 10, 2014, you can save $10 off the regular price and get Family Atlas for only $19.95 (plus s/h if you want the CD).  You must use the link below in order to get this discounted price.

www.rootsmagic.com/store/family-atlas/special.aspx

This special offer is only available until August 10, 2014 so get your copy of Family Atlas today!

Tip: Saving Your Spot in RootsMagic Using Bookmarks

 Bookmarks

Every person in your family tree is important, right?  As much as we may hate to admit it, sometimes certain persons are more important than others.  For example, imagine wandering around through the outskirts of your family tree when you realize it’s time to shut down for the night.  You wish there was a way that you could just pick up where you left off the next time you get on… and there is.

Meet your new friend the “Bookmark“.  Bookmarks work just like they sound… highlight a person on any of the main screens, press Ctrl+B (or do “Search > Bookmarks > Bookmark person” from the menu), and RootsMagic will remember that person for you.  Any person you bookmark will be listed in the Bookmarks tab of the side list like this…

Bookmarks

Just select any bookmark in the list and click Go, and RootsMagic will jump directly to that person.  There’s no limit as to how many bookmarks you create, although if the list gets too long you’ll want to make sure you read last weeks tip on incremental searching.  Your bookmarks are saved with your database so you can keep them as long as you wish, or you can highlight a bookmark in the list and click the red X to delete it.

Bookmarks are also great for when you need to temporarily go somewhere else in your tree and be able to quickly return to the current person.  Just bookmark the person you are on, go do whatever else you need to do in your tree, then quickly jump back to the original bookmarked person.

So remember, while every person in your family tree is important, bookmarks let you mark those that are the most important to you at the time. And, to avoid any hurt feelings, you might want to make sure any living family members don’t notice their absence from the bookmark list.

Tip: Find Exactly What You Want with a Few Keystrokes

IncSearch

You’re looking at the index of people on the main RootsMagic screen.  You see “Aldred, Mary” but you want to move to “Taylor, William”. Your only hope is to scroll down through the list, past thousands of names and 20 letters of the alphabet until you find what you’re looking for, right?

Sadly, we see this happening all too often, even with experienced RootsMagic users. The saddest part of all this is that it is completely unnecessary with RootsMagic’s fantastic incremental searching.

How does it work?

Step 1) Click anywhere inside whatever list you want to search in order to “select” that list. You can tell if it is selected because the colored bar highlighting the selected record will be blue instead of gray.

IncSearch1

Step 2) Start typing the text you want to search for. RootsMagic will automatically jump to the first matching record and will put an orange box around the text that you’re searching for.

IncSearch2

Step 3) Keep typing the text you want to search for until you find what you’re looking for. In the case of a list of names, once you match the surname, press the , (comma) key to start searching on given names.

IncSearch3

Step 4) If searching a list of names, start typing letters of the given names until you find the record you are looking for.

IncSearch4

That’s it! You just jumped through thousands of names from “Alred, Mary” to “Taylor, William” with just 8 keystrokes!

IncSearch5

And the best thing? It will work on almost every list in RootsMagic! Try it on lists of places, sources, fact types, and more to quickly find the record you need.

So if you haven’t used this feature in RootsMagic, what are you waiting for? Try it for yourself. And the next time you see someone slowly scrolling through a list in RootsMagic, share this time-saving tip with them. You’ll have the satisfaction of knowing that you saved someone from  hours of unnecessary scrolling and be promoted to “RootsMagic Hero” in their eyes.