New Tools in Personal Historian 2

Personal Historian has always had tools to help you write and organize: spell checker, thesaurus, readability check, outline creator, filters, and more.  Here are a few of the new or improved tools coming in version 2.

The first 3 tools I’m going to mention can be found on the screen where you write stories.  You can click the image to see it full size.

Multiple Categories

You can now assign a story to more than a single category.  Categories help you when you want to find or filter your stories.  You can create as many categories as you want, but in the past you could only assign a story to one of those categories.

Now it is possible to do things like assign a story to a “Private” category, a “Family” category, and an “Education” category all at once.  That story will then appear when you choose to view any of those categories.

People List

Personal Historian will now let you keep a list of all the people you mention in a personal history.  If you import from a genealogy file, those people will automatically be included in the People list, but you can also add additional people to the list as you see fit.  You can tag each story with people from the People list, and later filter the story list based on any group of people you choose.  For each person you can track their name, sex, relationship to the main person, and the range of dates they were involved in the main person’s life.

Place List

Many stories take place in more than one location.  You can now keep a list of all the places you mention in a personal history.  Like the People list, any places will automatically be added to the list when you import your genealogy file.  You can tag each story with places, and later filter the story list based on any group of places you choose.  Even cooler, you can filter the story list to only stories which occurred within a certain distance of any place.

Gazetteer

To assist with your places, Personal Historian also includes a Gazetteer of over 3.5 million place names.

Better Filtering

You’ve always been able to filter your stories in Personal Historian, but now it is even easier.  Status and category filtering can now be done instantly from the new filter panel on the left of the main Story List.

And don’t forget about the new filtering options mentioned above (people, places, and places within a certain distance).

More Story Tools

And here are a few of the handy tools available when you are editing a story:

  • Full screen mode lets you expand the edit area to fill the entire screen
  • The outline organizer now lets you copy your outline into the writing area
  • The improved Readability Check screen makes it easier to see how to improve your writing
  • You can now have Personal Historian read your story to you
  • Personal Historian can now be set up to take dictation (you talk and it writes)

Using LifeCapsules in Personal Historian 2

Our lives are shaped by more than just the things we do.  Historical events and cultural happenings (music, tv, movies, radio) all impact our lives and the things we do.  We’ve talked about adding stories to create a personal history, but Personal Historian allows you to add context to a person’s life with LifeCapsules.

A LifeCapsule lets you add topics to your story list about historical and religious events, epidemics, cultural happenings, and even “memory triggers”.  When you add a LifeCapsule to your file, Personal Historian will include topics in your main screen story list.  So, for example, if you add a U.S. history LifeCapsule, you will see historical events which occurred during the person’s life intermingled with your own stories.  In this sample screen you will see that several different LifeCapsules have been imported (click the image to see it in full resolution).

Now while you may want to write a story for certain LifeCapsule topics that get added, they are also useful for triggering other memories that you may want to write about instead.  For example, you might not want to write a story about the start of the Great Depression, but showing that it occurred during the teen years of a person might give you more insight into some of their behaviors later in life.

In addition to expanding the existing LifeCapsules, Personal Historian 2 adds a number of new LifeCapsules.  Included are (remember that features new in PH2 are bold):

  • African American history
  • Australian history
  • British history
  • Canadian history
  • Catholic history
  • Epidemics
  • Foods
  • Industrial Revolution
  • Inventions
  • Jewish history
  • LDS history
  • Memory triggers
  • Movies
  • Music
  • Radio shows
  • Television
  • Toys and Games
  • U.S. history
  • U.S. holidays

Stories added by importing a LifeCapsule work just like your own stories… you can edit them, delete them, filter or search by them, and include or exclude them in your published personal histories.

In addition, we will be releasing a new LifeCapsule Editor about a month after PH2 is released, so you will be able to create your own LifeCapsules to use and share with others.

In our next sneak peek we’ll look at some of the new tools in Personal Historian 2, including the new Person and Place Lists which you can use for tagging stories.

Importing Genealogy Data into Personal Historian 2

So where do you start when trying to come up with stories for a personal history?  If you have been entering data into a genealogy program you can use that information to get you started.

Personal Historian will import the events from any group of people you select, including any pictures or sources (remember, bold items are new in version 2).  You can import from RootsMagic, Family Tree Maker (16 and earlier), PAF, Legacy, or GEDCOM.

You can choose who the personal history will be about, as well as any other family members you want to include.  You can even select which events you want Personal Historian to import.  So you could just choose basic events like birth, marriage and death, or you could choose to include all events like occupations, residences, and more.  Personal Historian will display the imported events on the main screen Story List (click the image to see it in full resolution).

If you have any notes, sources, or pictures attached to events, Personal Historian will import those as well.

You don’t have to write a story for every event that Personal Historian imports, but you can use them as placeholders to write about later, or to just use for context in the person’s life.  If you really don’t want the event just highlight and delete it from the main Story List.  You also don’t have to stick with the computer generated story titles.  You can easily change “Kathleen Peggy Hobbs (Wife) was born” to “Ronald’s Future Sweetheart Arrives”.

Finally, what happens if you add more information to your genealogy software?  Well, just re-import the file into Personal Historian.  In the past that would have been a very bad idea because you would have ended up with duplicate events / stories.  But in version 2, Personal Historian will check as it is importing to make sure it doesn’t import duplicate events.

So once you have imported your genealogy information into Personal Historian, its time to add some context.  Next time we’ll talk about LifeCapsules, an easy way to add historical timelines or memory joggers to your personal history.

Writing Stories in Personal Historian 2

As I mentioned last time, putting together a personal history is as simple as writing some stories.  You don’t have to write your stories in any particular order… Personal Historian will arrange them for you as you create them.  So if you remember something that happened in the 4th grade, just click “Add Story” and write about it.  Personal Historian will bring up a screen like this to write your story (you can click on the image to see it larger).

The story writer has three sections: 1) information about the story such as the title, date, etc, 2) a story editor to write your story and 3) an organizer to help put your thoughts together.  As before, features new to version 2 will be bolded.

Story Information

When you write a story you can also include a title, the date (or date range) of the story, and the status of the story (are you still working on it, finished, or have you not even started yet).  These additional items are shown in the story list on the main screen and help you organize your stories.

But the real power of this additional information is the ability to categorize stories, and to tag a story with the people and places mentioned in the story.  This information can also be included in the main story list, but its main purpose is to help with selecting stories.  Imagine being able to say “Show me all the stories that occurred within 50 miles of Ames, Iowa“, or “Print just the stories that refer to one of these 5 people”.  And new in version 2 is the ability to assign a story to more than one category.

Word Processor

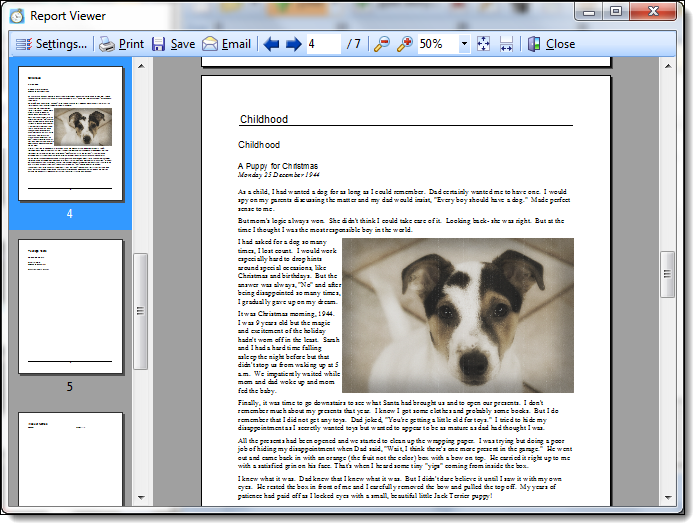
A big chunk of the feature requests for Personal Historian have to do with the story editor, so we spent a lot of time working on that.  The number one feature request was to allow text to wrap around pictures, and as you can see above, that wish has been granted.  Also new in version 2 is the ability to use multiple fonts in your stories.  But we didn’t stop there.  You can now create “styles” (which include font, attribute, and paragraph settings), and apply those styles to paragraphs in your stories.  If you change the settings for a style, that change will affect all paragraphs using that style.

If you have wanted more room to edit your stories, you can now click a button to toggle in and out of full screen mode.  And if you are the kind of person who likes to document your stories, Personal Historian now supports footnotes.

There are also a number of tools to help you write better, but we’ll talk about them in an upcoming article.

Organizer

Remember back when you had to write a paper in school?  Your teacher probably told you that you could write better if you first created an outline of your story.  Did we listen to that advice (probably only if our grade depended on it).  But those teachers were right, and Personal Historian provides an organizer that makes it easy to create an outline.  Just begin typing ideas into the organizer, but don’t worry about what order those ideas are in.  Just brainstorm and type everything you can think of that you might want to include in the story.  The organizer then lets you easily drag and drop all those ideas into an outline.  That outline is always available and is saved along with your story.

Coming Up

So are you worried about trying to come up with ideas for your stories?  In our next article I’ll tell you how to import story ideas from your genealogy software, and from there we’ll see how to use LifeCapsules for even more ideas (including a bunch of all new LifeCapsules in version 2).

Getting Started with Personal Historian 2

Time to start those sneak previews of Personal Historian 2 that we promised last week.  Rather than just list what’s new in PH2, I’m going to talk about Personal Historian features but I’ll bold the items that are new to version 2.

As I mentioned last time, Personal Historian lets you write stories about your own life or the life of your family members.  We have a lot of folks who order Personal Historian for their parents to get them to finally write down all those stories they like to tell (and that we like to hear).

But instead of just cramming all those stories into a big word processor file, Personal Historian displays a timeline of those stories (you can click on the image below to see the full resolution).  Just click “Add Story” and you can write a new story, complete with text, images, title, date, and much more.  You can assign each story to categories (PH2 now lets you assign more than one category to each story).  You can also tag each story with the people or places you have mentioned in the story.

You can choose which columns you want Personal Historian to display for each story, including the title, date, status, category, or age at which the story occurred.  New in PH2 is the info bar at the bottom of the page which will show you all the information about the currently highlighted story, so you don’t have to try and cram every column on the screen.

Personal Historian will automatically sort your stories as you add them, so it is easy to find any story you have already written.  You can change the order the stories are sorted just by clicking the header of the column you want to sort by.  When you want to work on a story, just double click the title of the story to open the story editor.

But Personal Historian is more than just a list of your stories.  It lets you filter stories any way you can imagine.  This means you can write all the stories of a person’s life, but then tell Personal Historian to only display certain stories as you work on them.  You can filter by date, age, title, categories, and even the people or places mentioned in the stories.

There are even shortcuts for some of the filters.  If you want to filter by the story status or categories, Personal Historian now displays a list on the left side of the main screen that you can just check or uncheck.  If you want to only display stories during a certain date range you can do that by dragging the left and right brackets on the timeline at the top of the screen.

One of the best new features in PH2 is the full text search.  In the upper right corner of the main screen is a field called Search.  Just type any text into that field and Personal Historian will filter your story list to include only those stories which include that text.  Personal Historian will even display the context that the search text is used in each of those stories.  But don’t let the simplicity of the full text search fool you.  You can display stories that don’t contain certain text, that contain some text but not others, or any other combination.

In upcoming articles we will touch on how to add historical and other timeline items (including the new LifeCapsules provided by PH2), the all new story editor, the enhanced import capabilities, and the new publisher.

Personal Historian 2 Sneak Preview

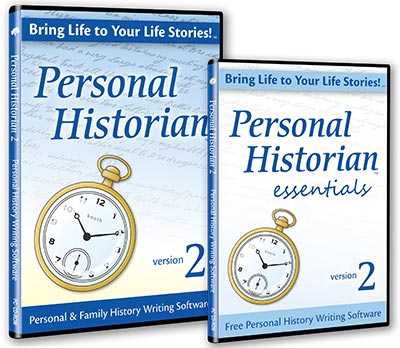
It’s no big secret that we are finally about to release Personal Historian 2.  We know it has been a long time coming.  Those of you who have been with us for a long time (back to the old Family Origins days) know that in the past we were able to get major upgrades of our programs out a lot quicker than we have recently.  I know we could make a lot of excuses as to why this is, but I hate excuses from companies I buy software from, and I know you feel the same.  So I’ll just say we have made some changes in priorities around here that will help us get all the really cool new stuff out to you faster.

We are currently beta testing Personal Historian 2, so for the next couple of weeks on the blog we will be offering a sneak peek at the new features which are coming.

But first, I know a lot of you may not be familiar with Personal Historian, so let me tell you a little bit about it.  Personal Historian helps you write… you guessed it… personal histories.  It could be your own life story, or the life story of one or both of your parents, or the life story of one of your ancestors.  Everyone has a story that needs to be told… in fact… a lot of stories.  And that is where Personal Historian comes in.  Instead of trying to type all those stories into a big word processor file, Personal Historian lets you add stories, and builds a timeline of those stories, like this:

You can choose which columns you want Personal Historian to display for each story, including the title, date, status, category, or age at which the story occurred.  Personal Historian will automatically sort your stories as you add them, so it is easy to find any story you have already written.  You can then just double-click any story in the list to edit it in a full featured word processor window.

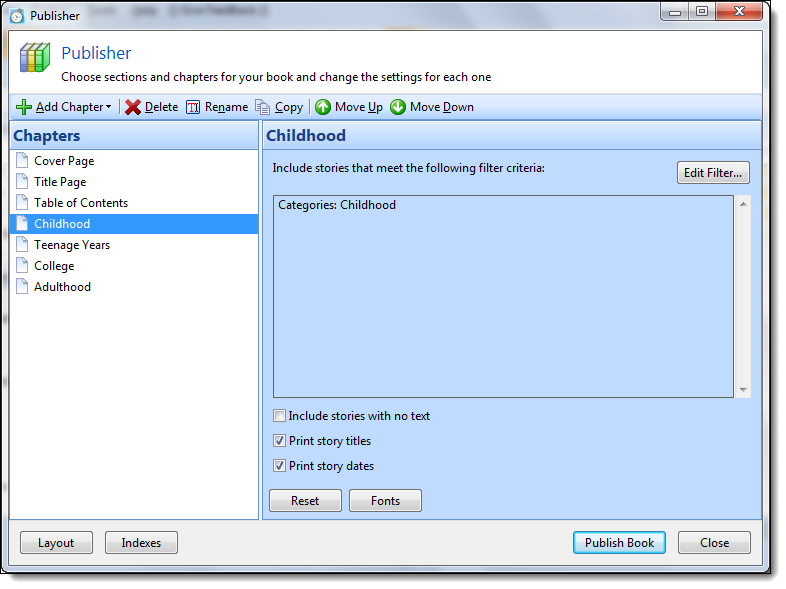
But Personal Historian is more than just a list of stories.  It lets you filter stories any way you can imagine, add historical and other timeline items, provides memory joggers and story organizing tools, and lets you publish all those stories (or any group of those stories) into a complete personal history.

So stay tuned the next couple of weeks as we show you all the cool new features in Personal Historian 2, the easiest way to write a personal history.

Free RootsMagic Webinars for August

We took the month of July off with our Webinars, and we know you missed them (you told us).  But we’re back and ready to go.  Here are 3 new classes scheduled for August.  Each class will be limited to the first 1000 people to sign up, but if you miss out or can’t make it, don’t worry because we will record the class for you to download and watch later.

To sign up for the free classes, or to view past recorded classes, visit us at:

http://www.rootsmagic.com/webinars

Here are upcoming classes for August:

  • Research Tools in RootsMagic
    The genealogy bug has bit you and you want to do more than just record what you already know.  RootsMagic is there to help with a large assortment of research tools which help you set goals, make to-do lists, track your progress, and even suggest places to look.  Join us for a look on how to extend your family tree further than ever before.
    Tuesday, August 16, 2011
    6pm MST See In Your Time Zone
    60 minutes
  • Getting Help Using RootsMagic
    Everybody needs a little help from time to time.  Nobody understands this better than RootsMagic so we’re pleased to offer many different methods of getting help for our software products- all free.  Join us for a look at the many ways we provide answers to your questions.
    Wednesday, Auguse 24, 2011
    6pm MST See In Your Time Zone
    60 minutes
  • Running RootsMagic on Your Mac
    You’re a Mac. RootsMagic is a PC. Or is it? Join us for a look at how thousands of Mac users are still using RootsMagic software on their computers- some WITHOUT even using Microsoft Windows at all.
    Monday, August 29, 2011
    4pm MST See In Your Time Zone
    60 minutes

And don’t forget that all the previous webinars were recorded, so you can download or watch them online for free.

Or if you don’t want to access them online, the webinars are now available for purchase on CD.  We have packed 10 webinars on each CD, and priced each CD at $9.95.  Click here for more information or to order the webinar CDs.

RootsMagic 4 Update Released (4.1.2.0)

Note: This post has been updated to include updates in version 4.1.2.1.

This minor update mainly fixes issues with RootsMagic freezing when trying to access New FamilySearch.  We would like to thank everyone for their patience the last couple of months as we worked to figure out what has changed with New FamilySearch to cause the frequent freezing and error messages some users were experiencing when accessing NFS through RootsMagic.  We discovered a number of behavior changes in the NFS API (such as API calls not being responded to in certain situations) which could cause RootsMagic to have to wait for NFS to return before it could continue (sometimes for 5-10 minutes or more).

If you have the RootsMagic News screen come up when you start RootsMagic, it may have already notified you of this update.  If not, you can do “Help > Check for Updates” from the RootsMagic menu to download and install this update.

You can also download the update from http://www.rootsmagic.com/updates/rootsmagic

Changes in 4.1.2.1

  • When doing Add > Parents, RootsMagic now adds the newly added parents to the side list
  • The place list is now updated when deleting an unused place from the unused place list
  • FamilySearch.org search works in WebSearch again
  • NFS passwords can have + and & characters now
  • NFS import would sometimes not import descendants correctly
  • Seal to spouse would sometimes print wrong when “Print basic events even if blank” is selected
  • Removed “Use secondary access method” option

Enjoy the Southern California Genealogy Jamboree from Home!

RootsMagic is pleased to be a sponsor of the 42nd Annual Southern California Genealogy Jamboree to be held June 10-12, 2011 in the Los Angeles Marriott Burbank Airport Hotel, 2500 Hollywood Way, Burbank, California.

If you live in the area, be sure to come by and see us in the exhibit hall or attend one of our classes taught by the RootsMagician himself, Bruce Buzbee.

But if you don’t live near by, we wanted to bring the experience of the Jamboree to you!  Through a special sponsorship provided by RootsMagic, several Jamboree sessions will be available at no cost to genealogists and family historians around the globe.  We’ve had a tremendous response to our own free online classes (webinars) and saw the opportunity to use similar technology to bring the Jamboree experience to people around the world.  This means that you can enjoy presentations from some of the top speakers in the genealogical community for free, right from the comfort of your own home!

Watch Online for Free

All live-streaming sessions will be held on Saturday, June 11, 2011.  They include the following: (Click on the link to read more and to register for the session)

Registration

To register for an online streaming session, click on a class title from the above list.

If you do happen to live in the Los Angeles area and would like to attend the jamboree in person, more information is available at http://www.scgsgenealogy.com/2011jam-home.htm.

We hope to see you there or online!

RootsMagic Classes now available on CD


RootsMagic Webinars on CD

Hopefully, you’ve been able to attend one of our free online classes (webinars).  If not, don’t worry- we’ve recorded them and made them available to view or download online.  Still, we’ve had many requests to make the recordings available in a convenient CD format.  Your wish is our command and we’re pleased to present RootsMagic Webinars on CD, Volumes 1 and 2.  Watch them right from the convenience of your own computer where you can follow along and set your own pace.  No internet connection required!  Don’t worry, the downloadable recordings aren’t going anywhere.  The CD’s are just our way of making them available to you in a more convenient, more permanent format.

Each Volume contains:

  • Not 1, but 10 complete classes covering a variety of topics and products
  • Recordings in standard .mp4 format, watchable on most Windows and Mac computers and portable devices
  • A browseable menu of classes with printable notes of topics covered in each webinar
  • Webinar Menu Screen

    Volume 1

    Over 13 hours of training on 1 computer CD!  Classes include:
    1. Getting Started with RootsMagic
    2. Publishing a Family History with RootsMagic
    3. RootsMagic and FamilySearch for Family History Centers
    4. FamilySearch Made Easy with RootsMagic
    5. RootsMagic To-Go: Running RootsMagic on a Flash Drive
    6. Sources, Citations, and Documentation with RootsMagic
    7. Working with Files and Folders in RootsMagic
    8. Cleaning Your Family Tree in RootsMagic
    9. Personal Historian: Bringing Life to Your Life Stories
    10. Creating Custom Reports with RootsMagic

    Volume 2

    Over 11 hours of training on 1 computer CD!  Classes include:
    1. Mapping Your Family Tree with Family Atlas
    2. Adding and Editing Information in RootsMagic
    3. Lists and Reports in RootsMagic
    4. Writing Your Personal History (and Living to Tell About It)
    5. Places and Mapping in RootsMagic
    6. Ask the RootsMagician
    7. Google Search Tips and Tricks with Lisa Louise Cooke
    8. Creating and Printing Wallcharts with RootsMagic
    9. Creating a Website with RootsMagic
    10. Google Earth for Genealogy with Lisa Louise Cooke

    Orders Yours Today

    The two volumes are priced at only $9.95 each (+s/h) and are now available to order at www.rootsmagic.com/webinars/cd or by calling 1-800-766-8762.  They are expected to ship on or around June 14, 2011 and are only available while supplies last.